Exporting Documents
All View types (i.e., Worksheets, Charts, Gauges, Maps and Dashboards) can be exported in a number of different file formats in order to utilize and manipulate your data in different ways.
To export a View:
- Click on the
button in the Settings menu (right panel) and select Export.
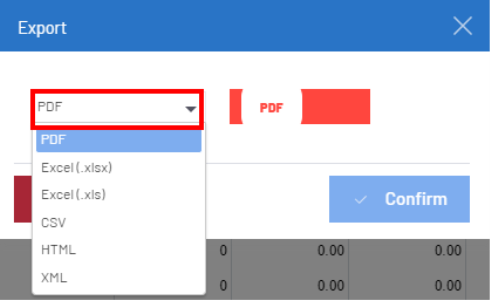
- In the drop-down list, choose the desired format and click on Confirm (shown in the image below).

- A new window will open once the file is exported (shown below).

- Click on Download.
By default, the file will be saved in your OS Download folder and will have the same name as the View.
Expanding Data in Excel
When exporting a Worksheet to XLS or XLSX format, Nectari allows you to expand its content in Excel.
You must expand group levels in Nectari in order for them to appear that way in Excel exports. Expanding the group levels gives you more control over the level of detail that is displayed.
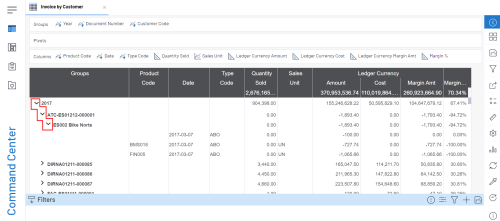
- Open a Worksheet and expand the desired group levels. In the example below, three groups levels have been expanded.

By default, the Total Row is the first group level that is expanded. That means that if there are three group levels expanded, there would be four levels of indentation rather than three.
There is a maximum of 6 expanded group levels supported (not including the Total Row). If more than 6 group levels are expanded in your Worksheet when you export to XLS or XLSX format, none of the group levels will be expanded in your output file.
- In the Settings menu (right panel), click on
and select Export.
- From the drop-down list, select XLS or XLSX and click on Confirm.
- A new window will open once the file has been exported (shown below).

- Click on Download.
By default, the file will be saved in your OS Download folder and will have the same name as the View.
- Open your file in Excel.
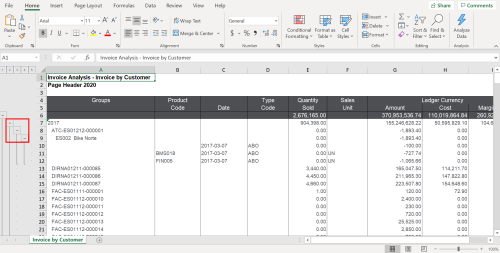
- Click on the + button on the left-side panel to expand a group level and the - button to collapse one (shown in the image below).

The numbers in the upper left-hand corner depict the worksheet's current level of indentation.