Settings for Sage Intacct
This section helps you configure the integration of Sage Intacct with DataSync so that they can communicate with each other.
Creating an Account in Sage Intacct
To set up the connection between Sage Intacct and DataSync, you need an account with Admin Privileges (User role permissions).
-
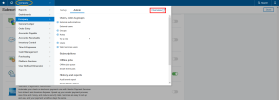
In the upper bar, click the Company category and select Subscriptions located under the Admin tab.
-
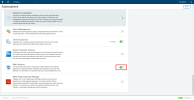
In the list, find Web Services and drag the slider to enable it. Ignore the warning about additional charges.
-
In the upper bar, click Overview located in the Company tab.
-
In the Company page, under the Setup section, click Company Information.
-
Go to the Security tab and click Edit.
-
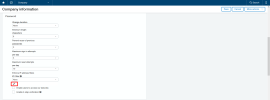
Under the Sign-in settings drop-down menu, in the Password section, click the pencil located under the IP Filter field.
- In the Username field, enter the Company ID provided by Sage (the one you used to log in).
-
In the IP Address Filter Information window, click Add.
- In the next window, in the Username field, select the User ID you used to log in.
-
In the Start IP Address and End IP Address fields, enter the IP address provided by the Nectari team and click Save.
- Once your User Name is in the list, you can close the IP Address Filter Information window.
-
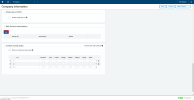
Back to the Company Information window, scroll down to the Web Services authorizations drop-down menu and click Add.
-
In the Sender ID field, enter NectariMPP and click Save.
Please note that the Web Services functionality configured in Sage Intacct requires a Web User License for external access. Therefore, a Web User License must be obtained from Sage Intacct to implement with Nectari.
Creating a Role for the User
Before creating a user, you need first to create a role so that the user can send API requests in DataSync.
-
In the upper bar, click Roles located in the Company tab.
-
In the Roles page, click Add.
-
In the Name field, enter Nectari and click Save.
-
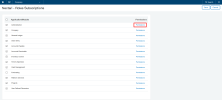
In the Roles Subscription page, select the Application / Module check box and click the Permissions hyperlink.
-
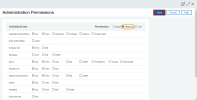
In the Permissions window, click Read-Only and then Save.
ImportantPermissions must be set to Read-Only for all modules/applications listed in this page, to allow / authorize DataSync to retrieve data from Sage Intacct.
-
Click Save.
Creating a User
After creating the role, you can now create the user that will be used to authenticate the connection between DataSync and Sage Intacct.
-
In the upper bar, click Web Services users, located in the Company tab.
-
In the Web Services Users page, click Add.
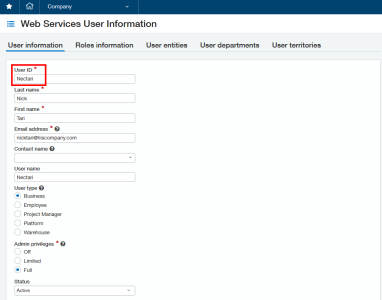
- Fill in the User ID, Last Name, First Name and Email fields.
- Under the User Type section, select Business.
-
Under the Admin Privileges section, select Full.
NoteSage Intacct will use the email address you enter here to send you the password associated with the User ID you set.
This User ID will be used for the configuration of the connection in DataSync .
- Once this is done, click the Role Information tab.
-
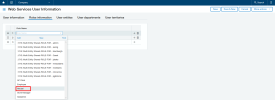
Click one of the lines and select Nectari in the Role Name drop-down list.
- Click Save and then OK in the pop-up window.
- In the Password window, enter the password you used to log in your Sage Account and click Done.
Once the user has been created, it will appear in the list as shown below :
You will also receive an email from Sage Intacct containing the credentials related to this user.
Configuration of Sage Intacct is now complete, so you can now proceed with DataSync connection settings.
Configuring the Source Connections
You need to create two source connections in DataSync:
-
A source connection that will be used for refreshing the data (for tables that can be loaded incrementally);
-
A source connection that will not incrementally refresh the data (for tables that cannot be loaded incrementally).
To create the Refresh source connection:
- In DataSync, create a new source connection.
- In the list, select Sage Intacct.
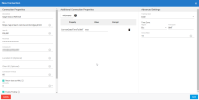
- In the Connection Properties panel:
- In the Description field, enter Refresh as the name for this connection.
- In the URL field, paste this address: https://api.intacct.com/ia/xml/xmlgw.phtml
- For the User ID, Password and Company ID fields, enter the credentials you received in the email from Sage Intacct.
-
In the Additional Settings panel, set the Tracking Type to Date.
ImportantThe DataSync server time zone must match the time zone of the server where DataSync is installed.
-
Click Save.
To create the No Refresh source connection:
- In DataSync, create a new source connection.
- In the list, select Sage Intacct.
- In the Connection Properties panel:
- In the Description field, enter No Refresh as the name for this connection.
- In the URL field, paste this address: https://api.intacct.com/ia/xml/xmlgw.phtml
- For the User ID, Password and Company ID fields, enter the credentials you received in the email from Sage Intacct.
-
In the Additional Settings panel, leave the Tracking Type set to None.
-
Click Save.
Configuring the Destination Connection
You need to create a destination connection for the Sage Intacct Data Warehouse. This connection will receive data from the Refresh and No Refresh source connections.
To create the Data Warehouse destination connection:
- In DataSync, create a new destination connection.
- Select SQL Server or Azure, depending on where the Nectari data warehouse is located.
-
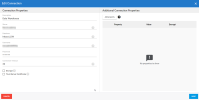
In the Connection Properties panel:
-
In the Description field, enter Data Warehouse as the name for this connection.
-
Enter the name of the server on which the database is installed.
-
Enter the name of the database to connect to.
-
Enter the user name and password.
-
-
Click Save.
- Create a Synchronization extraction type by following the procedures described in Adding an Extraction and Setting Up the Extraction.
- Follow the procedures described in Validating and Building an Extraction and Running an Extraction to retrieve data from Sage Intacct.
- Create a Schedule set to Incremental Load to automatically refresh the data by following the procedure described in Adding a Schedule.

