Configure Acumatica Essentials
To start using the Acumatica Essentials environment, there are a few steps that need to be configured:
Install the Acumatica Project
To use the Acumatica template, you must have the data synchronized correctly by setting up the Nectari inquiries within Acumatica. This is done by importing the Nectari project that will create all the inquiries required. The Nectari project creates inquiries that all start with NEC, which will be read from Odata.
To import the Nectari project:
-
Connect to Acumatica with a user with the proper access rights and navigate to Customization > Customization Projects.
-
Click Import and install the Nectari20XXRX.zip file the corresponds to your version of Acumatica.
NoteTo get the version of Acumatica, you can either:
-
Click the Tools drop-down list located at the upper-right hand corner then select About...

-
OR look for the version at the bottom of the Login page.

-
-
Click Save.
-
Check the box on the new line Nectari20XXRX.zip and click Publish.
Configure DataSync
Within Datasync, there are a few steps that should be set up before synchronizing data from Acumatica within Nectari.
Complete the Source Connections Setup
In DataSync, there are two connections created for Acumatica under the Connections screen.
-
Acumatica 2024 R1 – No Tracking
-
This connection is used when the table does not require data to be incrementally refreshed. Therefore, no date tracking is set.
-
-
Acumatica 2024 R1 – Tracking
-
This connection is used when the table does require data to be incrementally refreshed. Therefore, date tracking is set.
-
For these two connections, the following properties should be set:
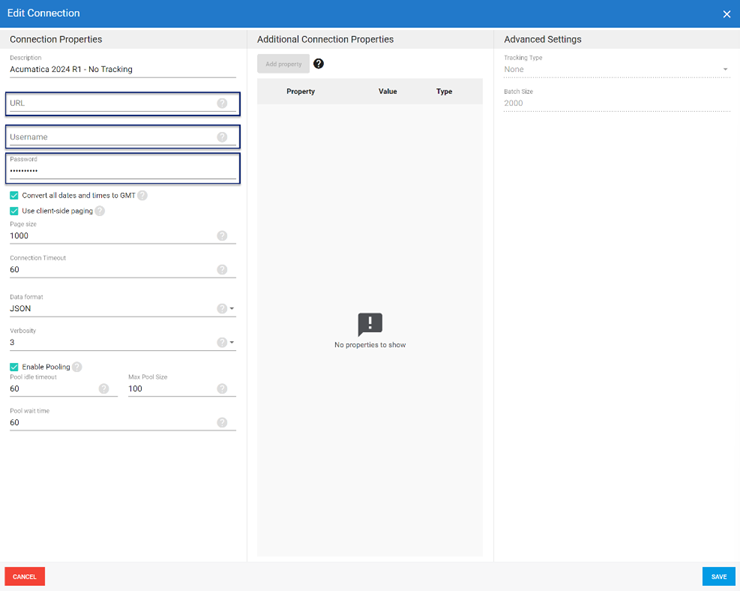
| Property | Description |
| URL |
Copy the Acumatica Application URL followed by OData/Tenant Name.
Note: %20 is how the web browser encodes spaces, so leave it as it is. |
| Username | Enter the username for the Acumatica account that will be used to read the data. |
| Password | Enter the password corresponding to the username entered. |
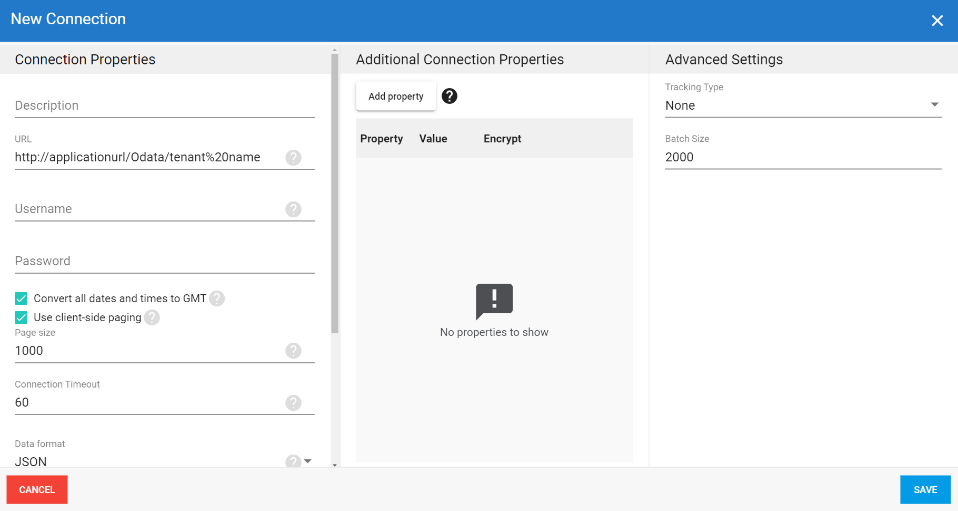
When the required information is entered, click on Save, where you will be notified if the setup was successful.
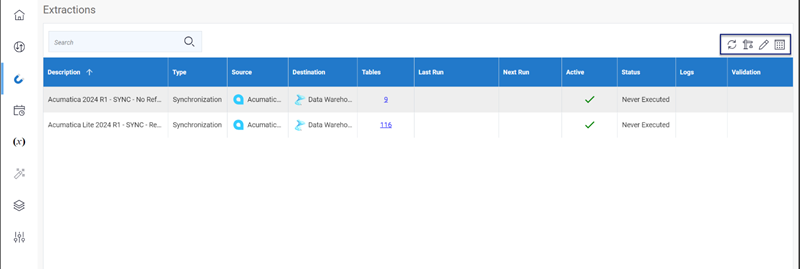
Validate and Build the Extractions
After the Source Connections have been configured, you will go into the Extractions screen to validate and build the two existing extractions as follows:
-
Select the extraction “Acumatica 2024 R1 – Sync – No Refresh.” Several buttons appear above the top right corner of the grid.
-
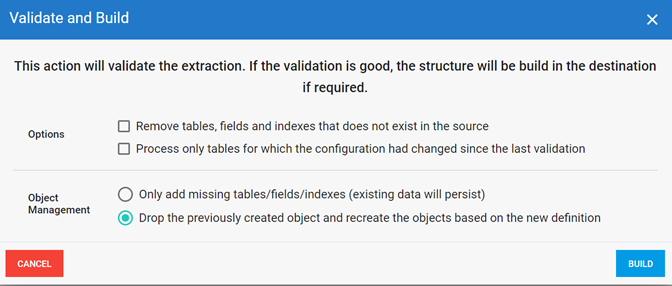
Click the Validate and Build icon on the top right corner of the screen.

-
From the pop-up window that appears, select Drop the previously created object and recreate the objects based on the new definition and click Build. This builds all the tables required within the data warehouse.
-
Select the Run Extractions button and choose Truncate and Load from the drop-down. This synchronizes the data from Acumatica into the data warehouse.
-
Repeat the same step for the extraction “Acumatica 2024 R1 – SYNC – Refresh.”
NoteIf you have custom fields that you would like to synchronize, you can follow the Elearning Essentials course, which is accessible through Nectari.

Start the Schedule
We will now activate the two jobs that are created within the Scheduler screen.
-
Select the job Incremental Load and click on Edit Schedule.

-
Activate the schedule by checking the Active checkbox.
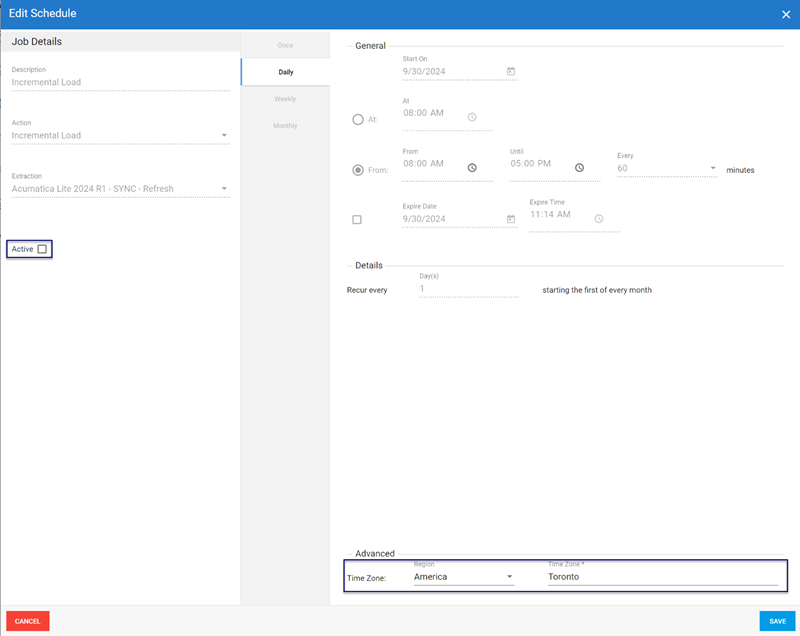 Note
NoteMake sure that the Time Zone set corresponds to the location where the Acumatica ERP synchronizes the data.
-
Click on Save.
-
Repeat the same steps for the Process and Delete job.