SQL Server Authentication
The installation packages require an Administrator Login to the Database Server.
The sa user is an administrator that can be used during the install and as the SQL Server user for Nectari.
If you want to avoid using the sa user to connect to the databases, you can create an SQL Server Login for Nectari:
- In the Server Roles list, this Login must have the sysadmin role during the
install.


- After the install, the sysadmin role can be removed. Note
As the installation ran with the custom Nectari login, the dbo user will be assigned to the defined login and be given the db_owner rights.
- Giving full
access to the Login used on the database.
 Note
NoteIf the Login is created after the installation packages ran, the Database Mapping must also be set on the Login to grant permissions.
- For maximum permission, leave db_owner only.
For minimum permission, tick only the following checkboxes: db_datareader, db_datawriter,
db_ddladmin.


Windows Authentication for SQL
Windows Authentication for SQL provides a secure method for authentication, leveraging Windows security features while allowing users to access databases without entering their credentials (limiting the risk of password exposure).
The same permissions assigned for the credentials-based SQL Server authentication are assigned for the Windows Authentication for SQL.
To enable Windows Authentication for SQL:
-
Open SQL Server Management Studio.
-
Connect to your SQL Server instance using your usual admin account.
-
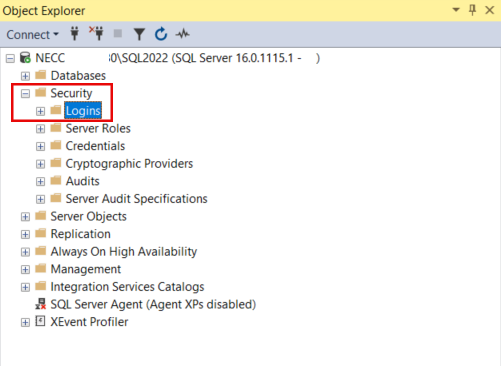
In the Object Explorer, expand the Security node.

-
Right-click on the Logins node and select New Login
-
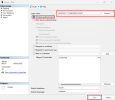
In the Login window:
-
Select Windows authentication.
-
Select Search... to find and select the Windows user YourMachineName\NecBIAccount.
-
Click OK.
-
-
Expand the Security node and then the Logins node (if they are not already expanded).
-
Double-click the server name under the Logins node.
-
From the left-hand pane, select Server Roles.
-
From the Server Roles list, check the box next to sysadmin.

-
-
In the User Mapping section in the left pane, you can select which databases you want to grant the user access to.
-
Once permissions are granted, click OK.