Account Grouping
Account Groupings serve two main purposes:
-
They used in calculating KPIs.
-
They are used in building reports.
Account Groupings defined in Sage X3 are automatically imported during installation of the template. Users can also generate custom account groupings directly in Nectari.
Create an Account Grouping
Account Groupings are specific to each Chart of Accounts.
First, define from which Chart of Accounts you want to perform an Account Grouping by doing the following:
-
In the Data Models and Views tab, expand the Sage X3 and Configuration folders.
-
Right-click on the Reporting Groups data model and select View Info Pages.
-
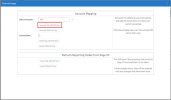
In the Charts of Accounts field, click on the prompt icon (the question mark) to select the Charts of Accounts code for which you want to generate an Account Grouping. Click on Confirm.
-
Click on Generate depending on your server (SQL or Oracle) to finish.
-
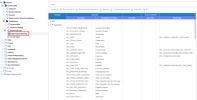
The generated list of an Account Grouping will be inserted in the Account Setup view.
-
Expand the Report Account Mapping data model to open the Account Setup view.
-
Fill in the Accounts columns with account numbers as follows:
-
Use the commas and colons to separate Accounts and Intervals respectively (ex: 12100,12250:12300,12305).
-
Use the asterisk to replace multiple characters (ex: 456* means all accounts beginning with 456).
-
Use the question mark to replace only one character (ex: 456* means the 4-digit accounts beginning with 456).
-
Refresh Reporting Codes from Sage X3
Reporting Codes defined in Sage X3 are automatically imported during installation, and changes made in Nectari will automatically be reflected in financial data models. However, if they are being maintained in Sage X3 itself, they must be manually refreshed in Nectari following any changes:
-
In the Data Models and Views tab, expand the Sage X3 and Configuration folders.
-
Right-click on the Reporting Codes data model and select View Info Pages.
-
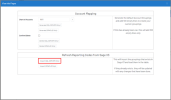
Under the Import Account Grouping from ERP section, click on the import associated with your (SQL or Oracle) server to finish.
Using the Import feature will not remove the Account Groupings you added previously.


