Creating a New Job
- On the right pane, click on
 Create a New Job.
This will open the Job Properties window.
General


- Description:
- Describes the actual Job. The details are written by the Administrator.
- Action:
- Determines if it will be sent by email or saved on the network. If the Action is set to Export and Save on Network Drive, then the system will require entering a network path, where a set of new folders will be created automatically by the Job: one folder for each user selected in the Users and Groups tab. Each folder will contain a copy of the Reports being run, with the respective users credentials. If the Action is set to Export and Email, the Reports will be run with each users credentials and sent out via email to the respective users.
- Status:
- Enables or disables the subscription.
In this tab, as in many other places in the Scheduler (and throughout the Nectari application), the
language can be changed by clicking on ![]() .
.
Web Views
This screen gives the option to select the Web Views to run automatically, search from the generic search box or use the filter to search a specific view.
- Click on the Views of your choice and
move them to the right box using the arrows.

- Once this is done, the Filter option can be
activated by clicking on
 .
. - In the View Properties window, click on
 to open the Restriction Editor window.


- Format:
- The export format can be selected for each view.
- Environment:
- Determines the environment on which the view is run.
- Filter:
- The filter option allows the selection of specific data to be distributed. Add a filter to the
existing one. Once it shows in the right window the Edit Filter will appear in the
right column. Click on it to access the View Properties window.
- Apply to Filtering Panels:
- When this option is enabled, the distribution of Dashboards respects the Global Parameters used as Filters in the Filtering Panels to impact only the Views that have these same Global Parameters.
For Report type views, if you select Excel or Excel Add-In in the drop-down list, the Reporting Tree feature becomes available. When enabled, one sheet is generated for each Node of the Reporting Tree.

- Add as many filters as required by selecting
the options using the drop-down list and click on Confirm.Example
Here, a filter expression is selected by Month and Current Month.


Excel Add-in Views
The Excel Add-in Views tab allows you to set up one or more Excel Files to be distributed during the Job execution.
- Click on
 to choose the Excel file you want to import.
 Note
NoteIf you want to add more than one Excel file, click on
to add another file tab then on to import the file.Tabs can be removed with
 .
. - Click on Upload to browse to the location where the file is.
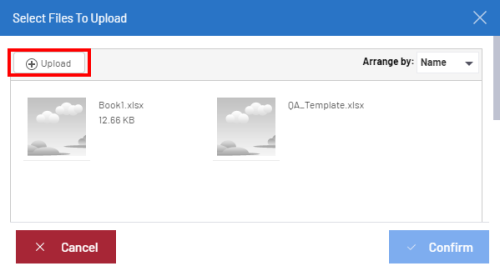 Note
NoteThe window will display a list of files in the Central Point.


- Select the file you want to import, click on Open then on Confirm to get back to the Job Properties window.


- Sheets:
- Once the File Name is determined, define which sheets in the file to distribute. You can select them all with the All sheets toggle.
- Format:
- Select the output format to send in:
- Excel: Excel file with the values only, all the formulas are removed.
- PDF: Generic static PDF file.
- CSV: Comma-separated values (excel format).
- Excel Add-in: Excel file including all the Add-in formulas. The calculation mode will be set to manual.
If you select Excel or Excel Add-In in the drop-down list, the Reporting Tree feature becomes available. When enabled, it replaces the one distribution file per value slider with one sheet per Reporting Tree node slider. The one sheet per Reporting Tree node slider will remove the Cell Value input column and generate Excel sheets based on the Nodes of the Reporting Tree you set as Distributable in the Administration section.
- Protection:
- Excel and PDF files can be password protected.
- Activate the option and enter the password that will unlock the files.
- Execution timeout:
- The maximum number of minutes that Nectari will wait before canceling.
-
(Parameters):
- To send parameters to the Add-in report.
To send a parameter to the Add-in report:
- Click on
- In the first drop-down, select the Sheet the parameter will be used in.
- In the second field, enter the location the parameter will be sent to (this can be either a cell number, or the cell’s name).
- In the last field, enter the value to assign to the cell.Note
Global Variables can be used instead of typing the value in manually.
A Parameter Value can overwrite existing data in the Excel file within the cell.
ExampleIn the Job Properties window:

In the Worksheet: the name is Site and the cell number B1.


It is possible to generate multiple files based on values separated by comma!
Let's imagine, you have an Excel file in which you have values regarding Companies and their Fiscal Years as shown below:
- If you leave the default value (meaning, you don't enable any One distribution file per value slider), the scheduler will generate only one file containing the 3 companies and their fiscal year values.

- If you enable the first One distribution file per value slider (the one for the Company), it will generate one file per Company so you would have a file for Company A with the fiscal years 2019 and 2020 and the same will be applied for Company B and Company C.
- If you enable the second One distribution file per value slider (the one for the Fiscal Years), it will generate one file per Fiscal Year and per Company so you would have a file for Company A with the fiscal year 2019, another file for Company A with the fiscal year 2020 and the same will be applied for Company B and Company C.

Consolidated Report
This option allows you to merge several Web Views (Worksheet, Chart, Vector Map etc) and Excel Add-In Views (Sheets from Excel files) into one PDF report.
The Web Views (Worksheet, Chart, Vector Map, Dashboard, Report, etc) and Excel Add-In Views (Sheets from Excel files) must be in PDF format. This is necessary so that they are included in the Consolidated Report, and not sent as separate files.
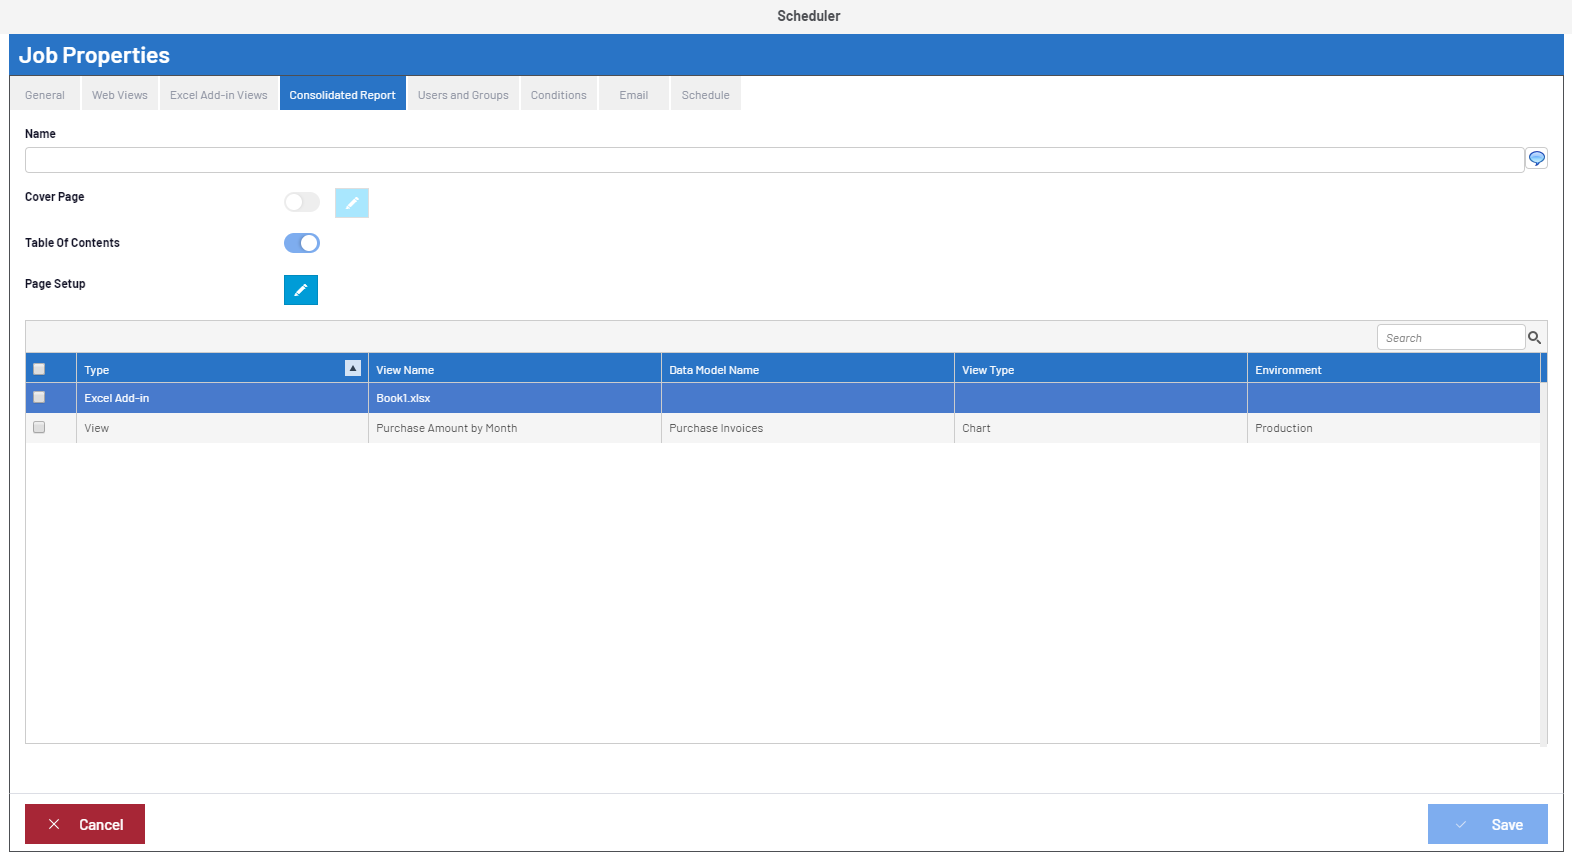
- File Name:
- Enter a name for the Consolidated Report. You can add a translation by clicking on
 .
. - Cover Page:
- Drag the slider to the right to add a cover page. Click on the
 to define the cover page.
 - Table Of Contents:
- Drag the slider to the right to add a table of contents. The table of contents is defined by the items you added in the Web Views and Excel Add-in Views tabs and will be inserted after the cover page (if enabled).
You can change the order of the elements (Views, Dashboards, Reports) in the list with a drag and drop.
- Page Setup:
- The Page Setup section allows users to customize the format of the page. The Page Setup only applies to the Cover Page and Table of Content.
Users and Groups
In the Users and Groups tab, the user can select the users and/or groups to receive automatic emails generated by the Job. At least one user needs to be selected in order for the Job to be saved.
The Scheduler will execute the View for each user or group defined, according to the security defined for them. If a view is sent to a group, only the users with the proper access will receive it, and the data in the views sent will also reflect the security access of the users, meaning that individual users may receive very different results.
It also takes into consideration the local settings of each user, for instance, sending the information in English for an English defined user or French for a French defined user, etc.
If you drag the Run As slider to the right, it will apply the security access of the selected user to the others.
- If you want to send emails to unregistered users, you can by adding their emails into the To, Cc or Bcc fields.
- Go to the Email tab to write the body of your message and the subject.
Conditions
This tab allows you to add a condition to the Data Model where the View is extracted.

Scenario
You receive invoices every day, but only want to receive the one from the previous day. Based on this principle, you set up the Scheduler to generate a Report only if this data exists. In this example, you select an Invoice By Customer view and apply a Filter from the Web Views tab to display only the data from the day before. Then you add a Condition as follows:
- Click on Add Condition.
- Click on
 to enter your SQL Condition into the Restriction Builder and click on Save.
 - Click on Confirm to finish.
Conditions apply at the Data Model level and not at the View level.
The Condition will not filter the View as such but will check if the Condition exists.
This tab is only accessible if you have selected Export and Email in the Action drop-down list of the General tab.
Use this tab to add a message (Description) and a Subject to the email sent by the Scheduler.

If you want to send emails to unregistered users, you can add their emails into the To, Cc or Bcc fields in the Users and Groups tab.
Schedule
- Set which frequency the Job should be performed and click on Save to finish.

