Single Sign-On (SSO)
This section is complementary to the step 11 in Installing the Web Application and Distribution.
Single Sign-On allows users to connect only once for several services.
It is possible to associate Nectari to an SSO server using SAML2 protocol.
Single Sign-On will not work with Web Central Point Configurator and DataSync.
Single Sign-On is only available On-Premise installation.
Many service providers offer SSO.
For example, the following procedure is given by Microsoft for Azure SSO (click here for more details).
- Add an unlisted application Azure AD Single Sign-On .
- Enter the following information:
- Sign on URL: Nectari login URL (e.g. https://yourserver:81) .
- Identifier: this URI must match the SEI Issuer URI configuration made when installing the package (e.g. https://yourserver:81/webclient) .
- Reply URL: Nectari connection page (e.g. https://yourserver:81).
- The next screen provides the following information:
- A certificate to save in: C:\inetpub\wwwroot\WebClient\App_Data.
- Issuer URL: copy and paste to the line ID Provider Issuer Name.
- Single Sign-ON Service URL: copy and paste to the line ID Provider URL.
- Single Sign-OUT: note that Single Sign Out is currently not available. Sign out of Nectari has to be done in its own application.
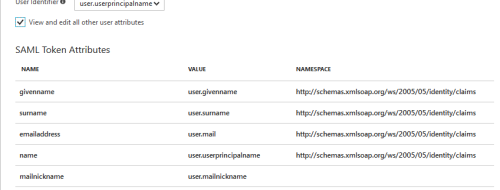
A field with the login for Nectari must also be defined. This name has to match with the line for SAML2 answer’s attribute for user name. This is used for SSO with Active Directory.
More details on this setting can be found here.
- The last step is to authorize users to use the application. Then they will be able to connect to Nectari at the same time than their other services.
Web Browsers have updated their policy regarding Cookies and these changes must be applied to your Web Client if you want Nectari embedded into your ERP website, or use Single Sign-On (SSO). Refer to Cookie Management for more details.
