Azure Single Sign-On for Excel Add-In
Building on the previously explained Single Sign-On (SSO) procedure, this feature adds more security and convenience when signing on to Nectari Excel Add-In using Azure Active Directory (Azure AD).
This page helps you set up Azure so that it can work seamlessly with the Nectari Excel Add-In.
First, configure the Azure Domain, as it will be from this platform that we retrieve the data required to correctly set up Nectari Excel Add-In.
Azure Domain Configuration
- In your Web browser, go to https://portal.azure.com/ and enter your login credentials (if required).
- In the left menu, click on Enterprise Applications.
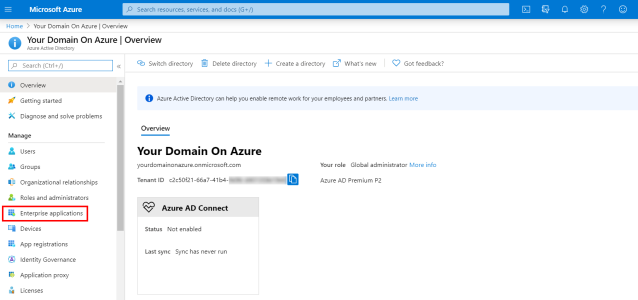
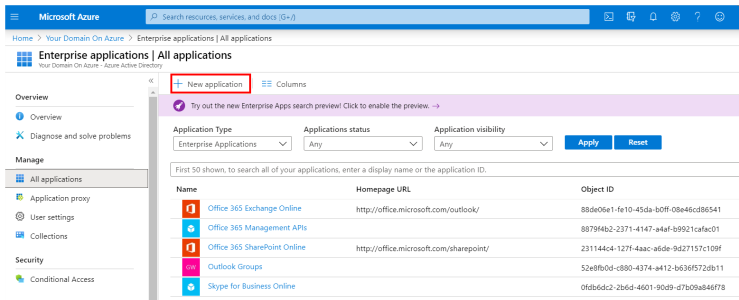
- In the upper bar, click on + New application.
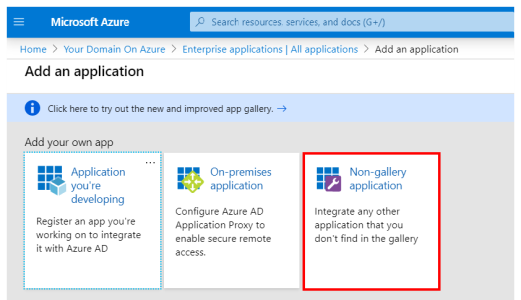
- Under the Add your own app section, select Non-gallery application.
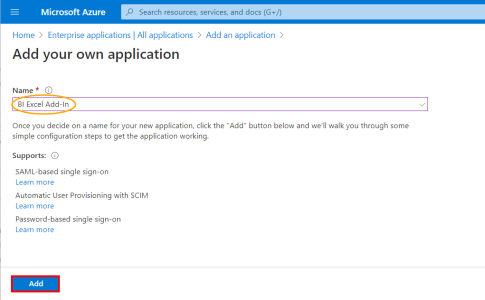
- In the Name field, enter a name for your application and click on Add.
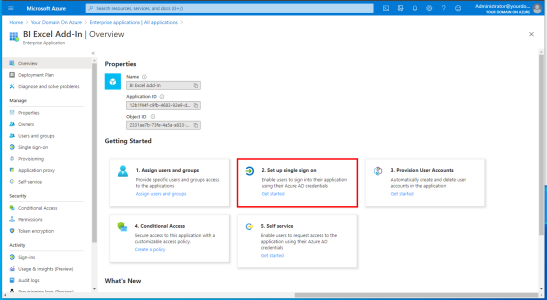
- Under the Getting Started section, select 2. Set up single sign on.
- Select SAML for the single sign-on method.
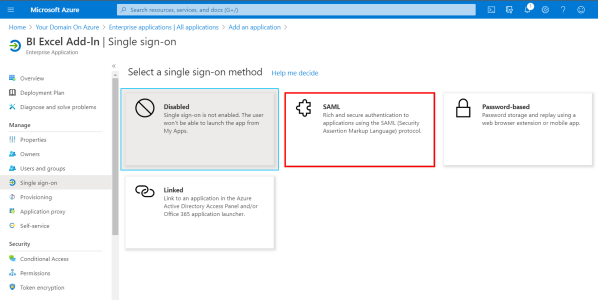
Although there are 5 sections for the SAML SSO method, you only need to set the following:
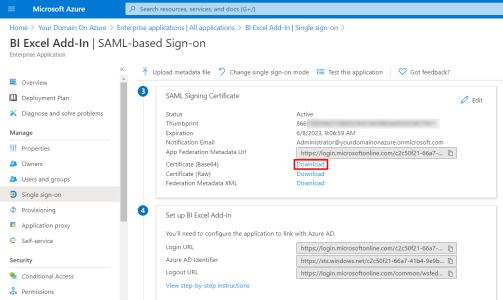
Download the Azure Domain certificate from the SAML Signing Certificate section and use the Set up BI Web Server section as a reference for the mapping of terms from the Nectari Installation Package. This is explained in further detail in Nectari Excel Add-In Configuration.
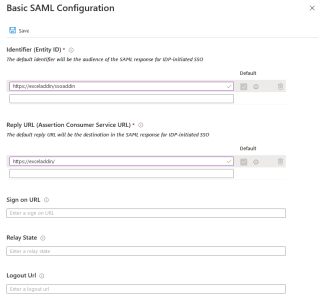
Basic SAML Configuration
- In the upper-right corner, click on the pencil to edit the Basic SAML Configuration section.
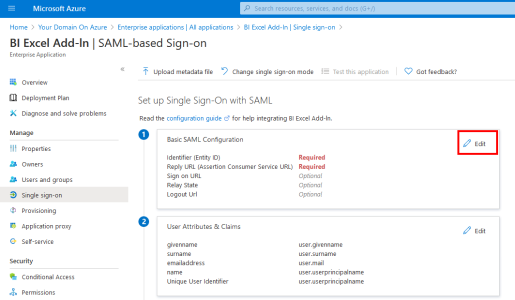
- In the Identifier (Entity ID) field, enter https://exceladdin/ following by a Unique Identifier for your Azure Domain.
- In the Reply URL (Assertion Consumer Service URL) field, enter https://exceladdin. This is the exact value you need to enter.
- Click on Save to apply changes.
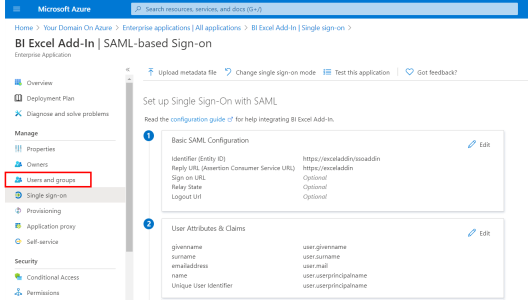
- In the left menu, under the Manage section, click on Users and groups.
- In the upper bar, click on + Add user to add the Users and Groups you want authorized to use SSO.
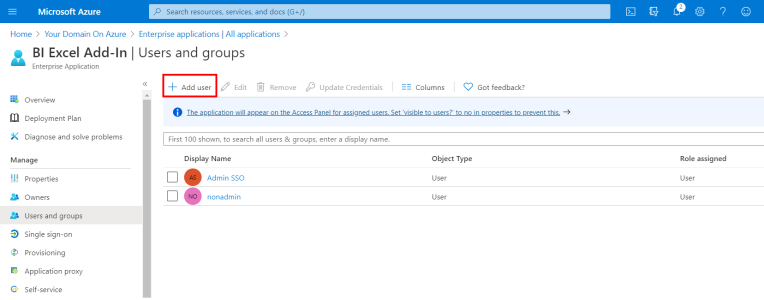
- This completes the Basic SAML Configuration section.
User Attributes & Claims
The installation package for the configuration of the Nectari Excel Add-In application automatically fills in the ssoNameAttribute parameter with the USERNAME attribute by default.
For Azure Domain, you can replace this value with one of the attributes listed in the User Attributes & Claims section.
If you want to use the mailnickname attribute (because you want to choose the part of the email address before the @ sign), you will have to create it, since this attribute does not exist by default in Azure Domain.
To do so:
- In the left menu, under the Manage section, click on Single Sign-On.
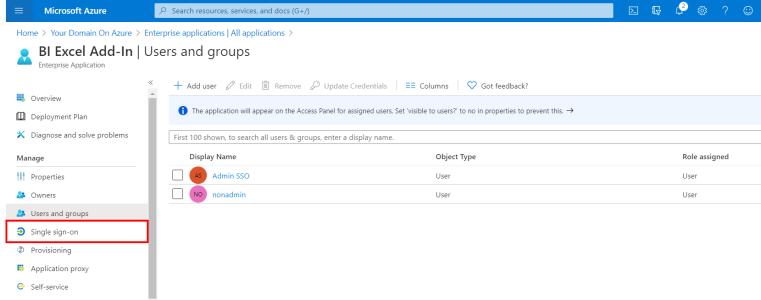
- In the upper-right corner, click on the pencil to edit the User Attributes & Claims section.
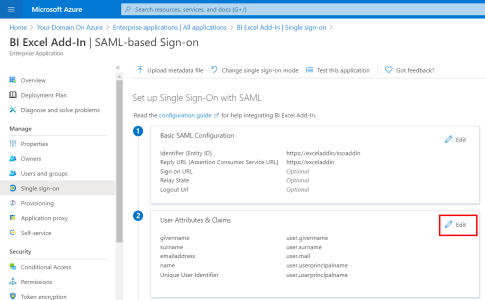
- Click on + Add new claim.
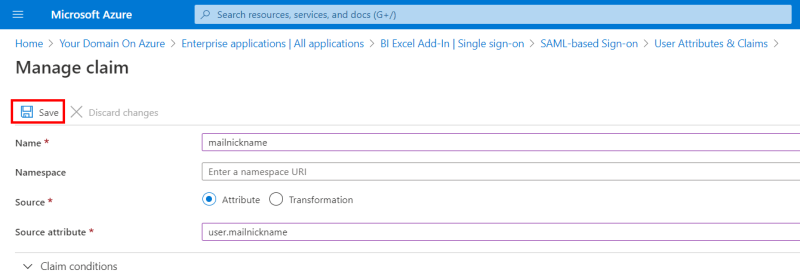
- In the Name field, enter mailnickname.
- For the Source, select Attribute.
- In the Source Attribute field, enter user.mailnickname and click on Save to finish.
Nectari Excel Add-In Configuration
Retrieving Azure Certificate
Before starting the Nectari Excel Add-In Configuration, retrieve the certificate from Azure Domain.
To do so:
- Scroll to the SAML Signing Certificate section and click on Download next to the Certificate (Base64) field.
Editing the EXCEL.EXE.config file
In order to fully benefit from Azure SSO functionality, you will have to edit the EXCEL.EXE.config file.
You can find this file here:
| Path | Office Version |
|
C:\Program Files (x86)\Microsoft Office\OfficeXX\ OR C:\Program Files (x86)\Microsoft Office\Root\OfficeXX\ |
32-bit |
|
C:\Program Files\Microsoft Office\OfficeXX\ OR C:\Program Files\Microsoft Office\Root\OfficeXX\ |
64-bit |
If you cannot find the EXCEL.EXE.config file in these locations, depending on if you are using Excel 32 bits or 64 bits, perform a search on C:\Program Files (x86)\Microsoft Office for Office 32-bit version or C:\Program Files\Microsoft Office for Office 64-bit version.
| Attributes in EXCEL.EXE.config file | Value before change | Value after change | Comments |
| ssoMode | "None" | "Saml2" | Enable the SAML2 Single Sign-On mode |
| ssoSpEntityId | "https://exceladdin/SomeEntityId" | "https://exceladdin/ssoaddin" | Modify with the value entered in the Identifier (Entity ID) field according to your choice in Basic SAML Configuration |
| ssoSpReturnUrl | "https://exceladdin/" | "https://exceladdin/" | Should never be modified |
| ssoServiceAddress | "http://localhost:4504" | "http://yourserver:4504" | Modify according to your BI Service address |
| ssoWebURL | "http://localhost:81" | "http://yourserver:81" | Modify according to your Web Client address |
| ssoNameAttribute | "USERNAME" | "USERNAME" | Modify according to your choice in User Attributes & Claims |
| ssoDefaultCentralPoint | "\\SERVER\CentralPoint" | "\\YOURSERVER\CentralPoint" | Modify according to your Central Point Shared Folder path |
| ssoIdpEntityId | "https://stubidp.sustainsys.com/Metadata" | "https://sts.windows.net/c2c50f21-66a7-xxxx-xxxx-xxxxxxxxxxxx/" | This is the value you retrieved from the Azure AD Identifier field in the Set up BI Web Server section |
| ssoModeSignOnURL | "https://stubidp.sustainsys.com/" | "https://login.microsoftonline.com/c2c50f21-66a7-xxxx-xxxx-xxxxxxxxxxxx/saml2" | This is the value you retrieved from the Azure Login URL field in the Set up BI Web Server section |
| ssoSigningCertificateFileName | "stubidp.sustainsys.com.cer" | "BI Excel Add-In.cer" | For the Full certificate name field, enter the name of the certificate you downloaded from Azure Domain with the .cer extension (for example: BI Excel Add-In.cer). |
Steps after the Installation/Configuration
Copying the Azure Domain Certificate
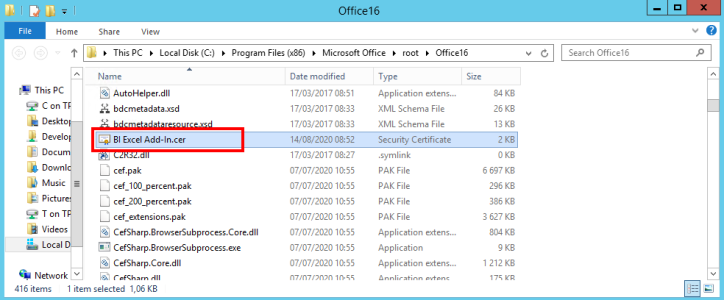
- Copy the certificate you downloaded from Azure Domain and paste it into your Office Excel folder (refer to Editing the EXCEL.EXE.config file for more details regarding the location).
Creating Users / Groups in Nectari
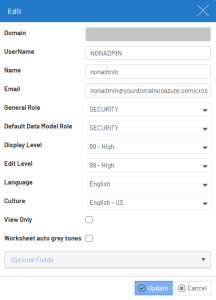
- Refer to Users to create your Web Client user by entering the same value for User Name and ssoNameAttribute you defined during the configuration of your EXCEL.EXE.config file.
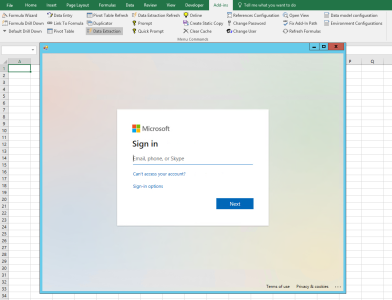
Accessing Nectari Excel Add-In with Azure SSO enabled
If you need to change a user connected with Single Sign-on, close Excel and clear your Internet Explorer 11 cache (refer to Internet Explorer & Microsoft Edge). This step is only required for Internet Explorer, as it is a Windows component and can access Windows cache. Other Web Browsers use their own cache.
