Excel Add-in Views
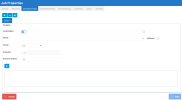
The Excel Add-in Views tab allows you to set up one or more Excel Files to be distributed during the Job execution.
-
Click
to choose the Excel file you want to import.
NoteIf you want to add more than one Excel file, click on
to add another file tab then on
to import the file.
Tabs can be removed with
.
-
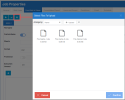
Click Upload to browse to the location where the file is. The window will display a list of files in the Central Point.
-
Select the file you want to import, click Open then Confirm to get back to the Job Properties window.
-
Once the File Name is determined, you may choose to add a Custom Name by clicking the toggle button to enable the field.
This option allows you to customize the distribution file, in which you can:
-
Add a custom name, with multilingual options.
-
Add Global Variables and Special Variables.
ExampleInvoice by Customer @@CURYEAR Period @@UDM_CURPER
NoteUppercase and lowercase letters (A-Z, a-z), digits (0-9), and the underscore (_) symbol cannot be attached at the end of a global variable name.
ImportantWindows files do now allow the following characters: " \ / : | < > * ?. If these characters are present in the custom name, the distribution job will fail.
If a file with the specified name already exists, it will be overwritten.
Global Variables and Special Variables will be resolved based on the default environment only: Admin for OnPremise, and ADMCA for CloudMode.
-
-
Next, you can define which sheets in the file to distribute in the Sheets field. You can select them all with the All sheets toggle.
-
In the Format field, select the output format:
-
Excel: Excel file with the values only, all the formulas are removed.
-
PDF: Generic static PDF file.
-
CSV: Comma-separated values (excel format).
-
Excel Add-in: Excel file including all the Add-in formulas. The calculation mode will be set to manual.
NoteIf you select Excel or Excel Add-In in the drop-down list, the Reporting Tree feature becomes available. When enabled, it replaces the one distribution file per value slider with one sheet per Reporting Tree node slider. The one sheet per Reporting Tree node slider will remove the Cell Value input column and generate Excel sheets based on the Nodes of the Reporting Tree you set as Distributable in the Administration section.
-
-
In the Protection field, activate the option and enter the password that will unlock the files. Excel and PDF files can be password protected.
-
In the Execution timeout field, set the maximum number of minutes that Nectari will wait before canceling.
-
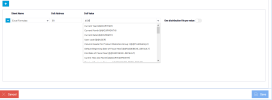
To send a parameter to the Add-in report:
-
Click
- In the first drop-down list, select the sheet in which the parameter will be used.
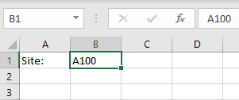
- In the second field, enter the location the parameter will be sent to (this can be either a cell number or the cell name).
-
In the last field, enter the value to assign to the cell.
NoteGlobal Variables can be used instead of typing the value in manually.
A parameter value can overwrite existing data in the Excel file within the cell.
-
-
Click Save.
It is possible to generate multiple files based on values separated by comma. For example, if you have an Excel file in which you have values regarding Companies and their Fiscal Years as shown below: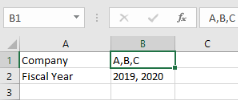
- If you leave the default value (meaning, you don't enable any One distribution file per value slider), the distribution will generate only one file containing the 3 companies and their fiscal year values.
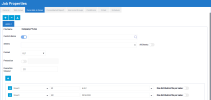
- If you enable the first One distribution file per value slider (the one for the Company), it will generate one file per Company so you would have a file for Company A with the fiscal years 2019 and 2020 and the same will be applied for Company B and Company C.
- If you enable the second One distribution file per value slider (the one for the Fiscal Years), it will generate one file per Fiscal Year and per Company so you would have a file for Company A with the fiscal year 2019, another file for Company A with the fiscal year 2020 and the same will be applied for Company B and Company C.
