Importing the Extractions
This feature allows you to import a pre-defined template or to restore a backup that you may have done yourself with the Export feature (refer to Exporting an Extraction for more details).
-
Click one of the extractions in the list then on the Import icon
located on the upper right-hand corner.
- In the Import Extraction window, click the Choose a zip file hyperlink to browse to the location you saved the export .zip file or drag it directly into that window and click Next.
For Acumatica, four zip files will be provided.
- For installations with a single tenant (customer), use the DS_EXTR_[Software-Version]_[Extraction-Version]_Acumatica with refresh DS-SYNC.zip file for the source connection with the tracking by Date and the DS_EXTR_[Software-Version]_[Extraction-Version]_Acumatica w_o refresh DS-SYNC.zip file for the one with no tracking.
- For installations with multiple tenants (customers), use the DS_EXTR_[Software-Version]_[Extraction-Version]_Acumatica with refresh DS-CONSO.zip file for the Source connection with the tracking by Date and the DS_EXTR_[Software-Version]_[Extraction-Version]_Acumatica w_o refresh DS- CONSO.zip file for the one with no tracking.
-
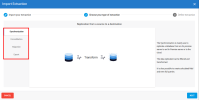
On the left pane, select the type of extraction you want to perform and click Next.
Important- For installations with a single tenant (customer), select Synchronization.
- For installations with multiple tenants (customers), select Consolidation.
-
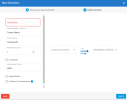
Refer to Setting Up the Extraction to define the extraction and click Import to finish the process.
Please note that you must enter a CompanyID value in the Unique Identifier column.
The Extractions window will automatically switch to the Tables window.
Refer to Adding an SQL Query if you want to add SQL statements to some tables and Configuring Table Fields to customize the fields (add calculation, change destination name etc.)


