Toolbar
This topic describes the tools that allow you to interact with the views, dashboards or reports in Nectari.
The following tools are accessible by clicking on a cell or an area in the view, dashboard or report:
Expand / Drill Down
When data is grouped by one or more fields, you can expand/drill down (show) or collapse/drill up (hide) the grouped data.
- Select a row or click on a chart area.
-
Click the Expand/Drill down option.
In a worksheet, it looks like this:
The first icon expands the selected line and the other icon expands all the group levels.
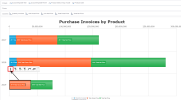
In a chart or dashboard, it looks like this:
You can also use the arrows or
located to the left of the summary line to expand or collapse.
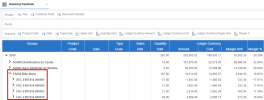
Here, we grouped the information by year:
We clicked the arrow next to ES002 Bike Norte to view the detailed information for that specific customer.
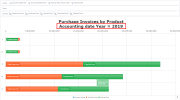
Click the located in the lower right hand corner icon to collapse/drill up data in a chart.
Instant Filters
This feature allows you to visualize a subset of data with specific common criteria instantly
To apply an instant filter:
-
Click on a cell or chart region containing the value you want to filter.
-
Select one of the following three options:
-
Add to Filter: Adds the selection to the current filter.
-
Filter by Selection: Applies the selection to all data (the current filter will be replaced).
-
Exclude from Filter: Excludes a specific selection from the current filter.
-
In the Invoice by Customer worksheet, we only want to retrieve the records specific to these two customers: FR003 Cybertek and NA003 Fun Times Stores. In order to do so, we:
-
Select the worksheet cell that contains FR003 Cybertek.
-
Hold the Ctrl key down and select the column cell NA003 Fun Times Stores.
-
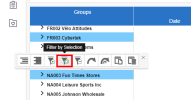
Click
Filter by Selection.
The worksheet will then be refreshed to reflect the selected filter. As a result, only records related to FR003 Cybertek and NA003 Fun Times Stores are displayed.
To remove rows that have Null or 0 in a column, we add an additional filter by clicking on the cell that contains Null or 0 and by selecting Exclude from Filter.
The result displays only the data with values:
Filters are indicated at the bottom of the worksheet in blue boxes.
It is possible to apply instant filters on multiple values.
-
Hold down the Ctrl key.
-
Select different values by clicking on each one while holding the Ctrl key down.
-
Once all the values are chosen, apply the Filter.
Link To
In Nectari, the Link To function allows you to navigate from one view to another through navigation links by passing by filters of the selected rows to the linked view.
Link To can also be used for Application Links to open an external URL where the selected value is changed dynamically through Global Parameters or Global Variables.
This feature can also be used with charts, dashboards and reports.
By default, links open internally, i.e. right next to the tab that contains the current view. You can specify whether you want these links to open in a new tab in your Web browser or in a pop-up window in Profile.
To use the Link To feature:
- Select one or more rows to be filtered.
- Click the selected row(s) and select one of the curved arrows for the Link To or Link To With Parent Values features.

The Link To and Link To With Parent Values features work if used within the same data model. To perform a Link To between two data models, you need to set a global parameter in the Data Model Designer.
When using the Link To feature, Nectari presents a list of all the application and navigation links that are related to the selected value.
When you select a Product, the Inventory and Invoice data models may be presented, as the Product is present in both. However, if you select a Customer, only the Invoice data model may appear as the Customer is only present in this data model.
When using the Link To With Parent Values feature, Nectari presents a list of all the application and navigation links that are related to the selected value (including all fields from higher levels in the grid), and makes them available.
A Navigation Links window opens with the predefined choices of views.
- Find the view in the list.
-
Click on Link to to open the selected view in a new tab or pop-up window, based on the settings you defined in Profile.
Copy Selection / Copy Row
To copy data from a worksheet, two options are available in Nectari: Copy Selection and Copy Row.
The first icon copies the data of selected cell and the other icon copies the entire row where is located the selected cell.


