Settings
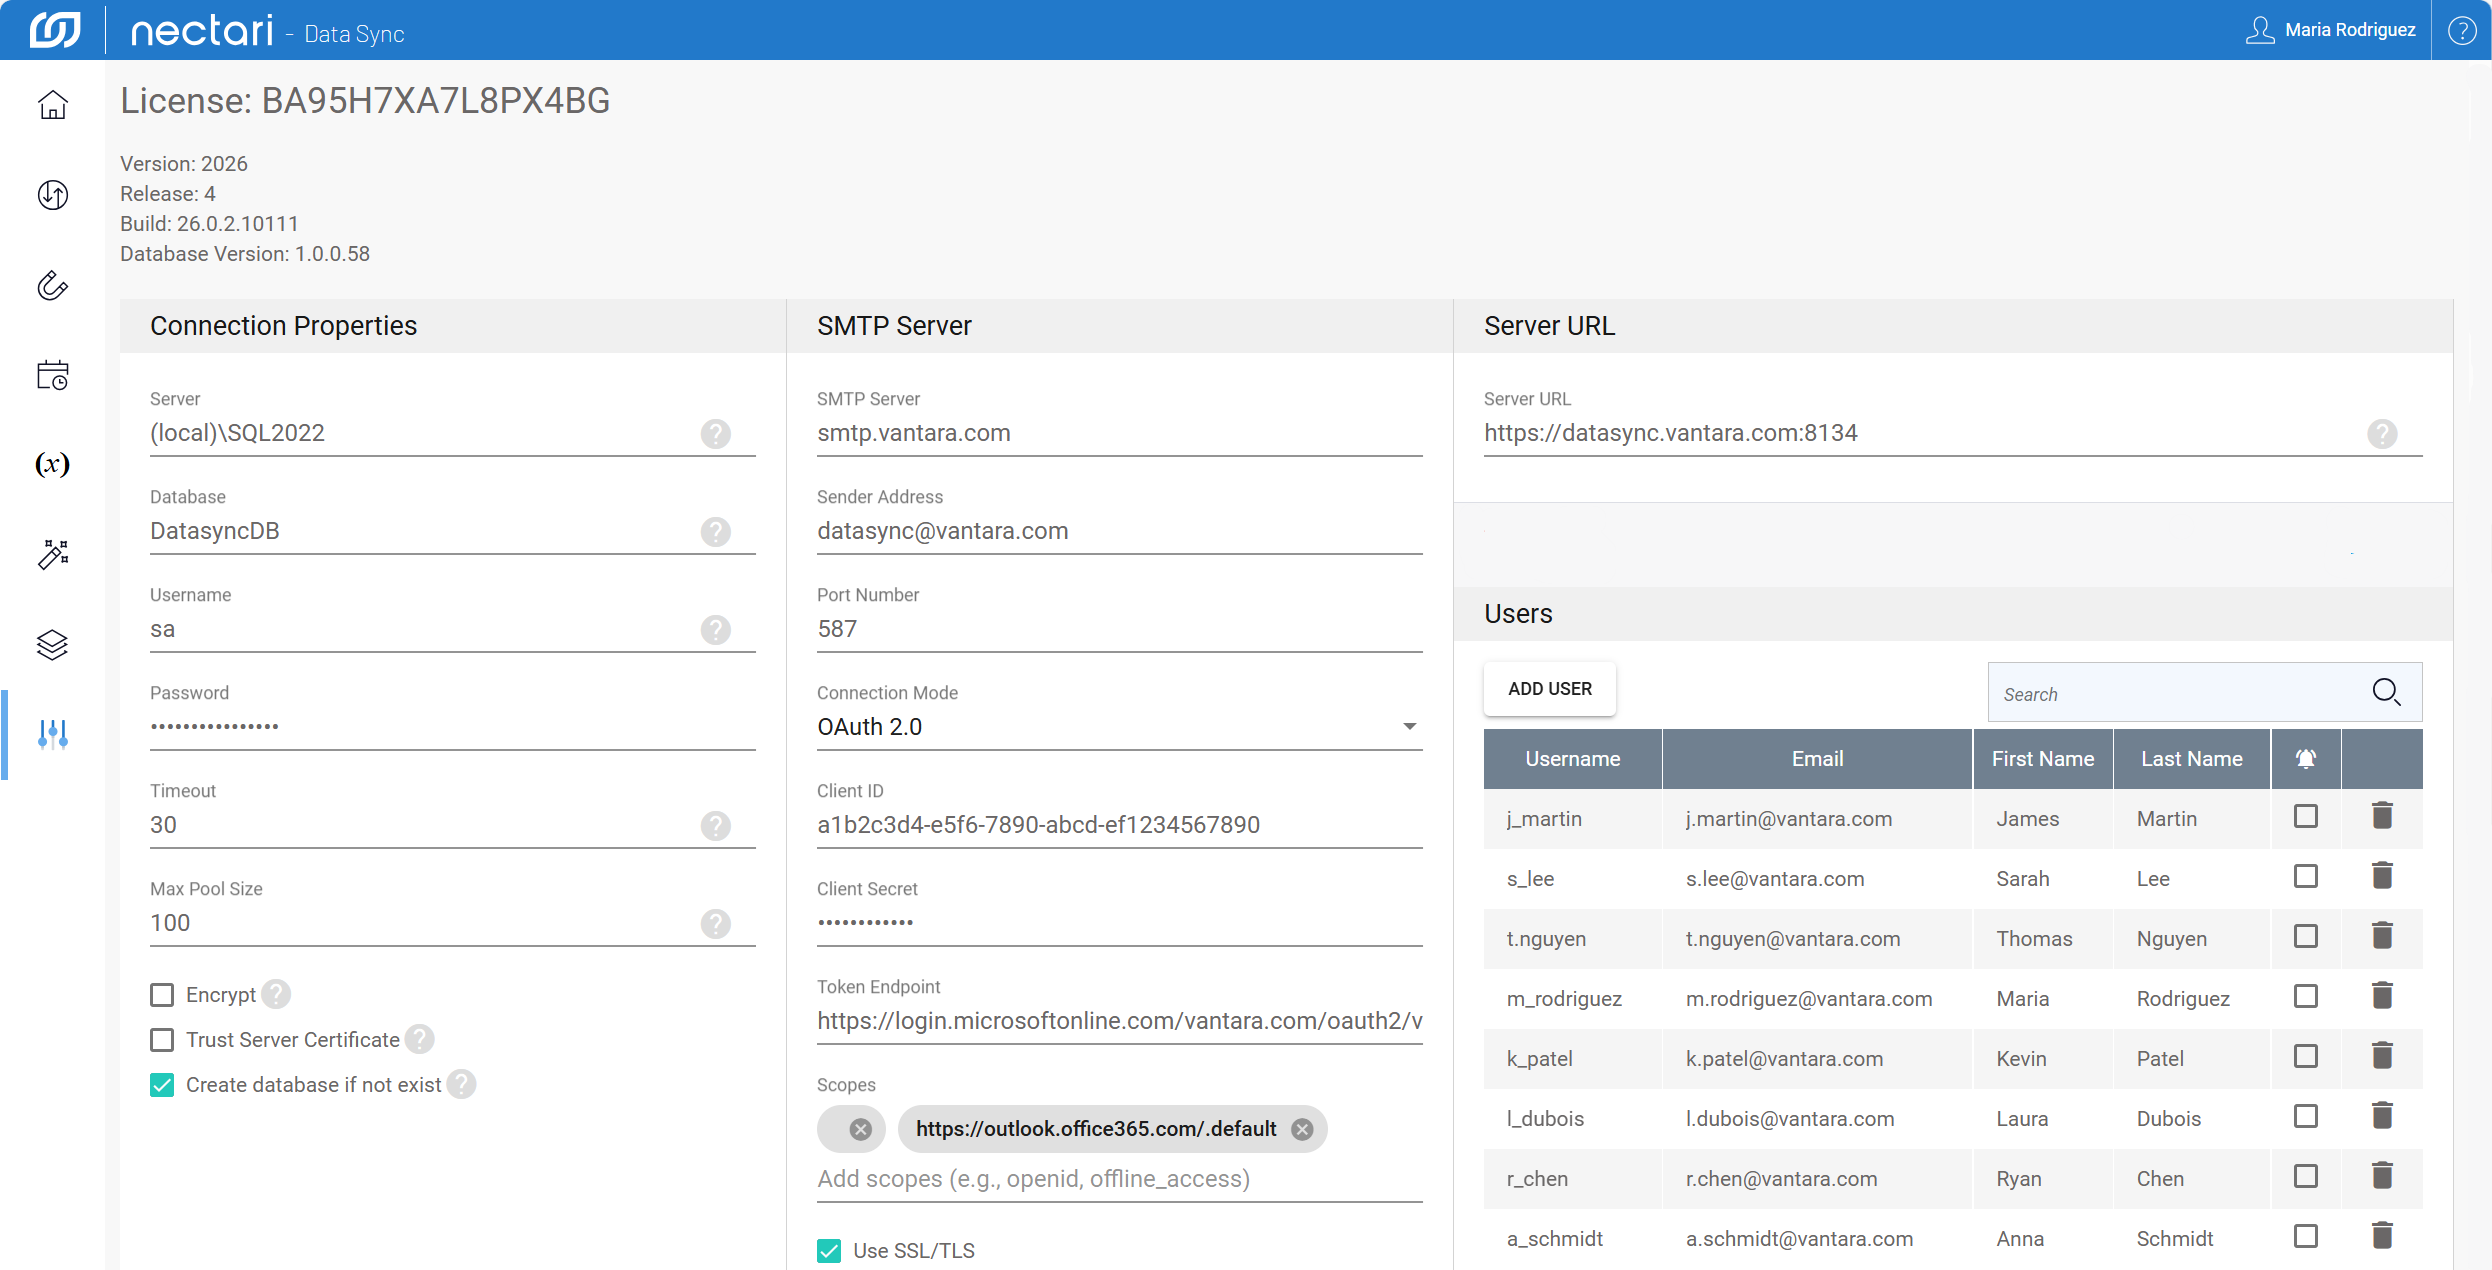
The Settings is the central place to manage system-level configurations for DataSync. From here, you can review your license and version details, manage who has access under your license, configure the database connection, set up the SMTP server for email notifications, and define the server URL for your environment.
The Connection Properties and SMTP Server panels are typically configured during the initial setup. If you need to adjust any of these settings, see Set up DataSync for detailed instructions.
System information
This section shows read-only details about your current DataSync installation. These details are useful for tracking which version is running and confirming that an update was applied correctly.
- License is the license number assigned to your DataSync installation, used to manage access and entitlements.
- Version is the DataSync version currently installed on your server.
- Release is the release number tied to this version, reflecting the specific set of features included in your build.
- Build is the exact compiled instance of the software. Useful for pinpointing a specific patch or hotfix.
- Database Version is the version of the internal DataSync database schema currently in use.
Configuration panels
| Panel | What it controls |
|---|---|
| Connection Properties | Controls how DataSync connects to its database, including server name, database name, credentials, and advanced connection options. |
| SMTP Server | Defines the outgoing email server used to send notifications, including sender address, port, and authentication method. |
| Server URL | The URL used to access DataSync in your environment, used by clients and web connections. |
| Users | Lists all user accounts associated with the current license, with options to add or remove users. |
Add users
Multiple users can be added under the same license. Each user gets their own account to log in and work with DataSync independently. Email notifications are turned off by default for every new user, so make sure to enable alerts for anyone who needs to be informed when a scheduled job fails.
- From the welcome screen or left navigation pane, select Settings.
- Under the Users panel, click Add User.
- Enter a unique username, email address, first name, and last name.
- Select the notification bell to enable email alerts for job failures.
- Select the save icon to register the new user.
To remove a user, select the trash icon next to their name in the Users panel.