Setting up the Security Level
The Reporting Tree features in Excel are available only if they have been enabled in the Roles:
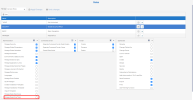
- In the Administration section
, click on the
Security drop-down menu in the left pane.
- Select
Roles.
- In the upper right-hand corner, select General Roles in the Manage drop-down list.
- Select the Role category (Basic, Security, Manager) you want to give access to the Reporting Tree.
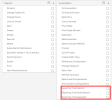
- Under the Excel Add-in section, tick the Reporting Tree options you want to grant to this Role category: Reporting Tree Selector, Reporting Tree Node Selector or / and Reporting Tree Duplicator.

Make sure that the user you are granting access to the Reporting Tree to is also set to the same Role category. Refer to Users for more details.
The first time the user opens a workbook in Excel, the three Reporting Tree options will be clickable. Depending on the one you enabled in the Administration, other options will become greyed out.
To give a user access to the Reporting Tree feature for the Reports:
- Under the Reports section, tick the Use filtering function checkbox.

- Click on Apply changes to confirm.
If not ticked, the Reporting Tree feature in the Report properties will become greyed out and the Reporting Tree option on the right pane will be hidden (refer to Setting up the Security Level).
Limiting access to the Reporting Tree
You can decide whether or not a user can build their own Reporting Tree by enabling this option:
