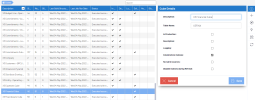
Editing a Cube
- In the Cubes list, click a cube.
-
In the Cube Details dialog box, edit the fields and/or select the options as described in the table below.
-
Click
Save.
| Field | Description |
|---|---|
| Description | The description of the cube. |
| Table Name | Name used in the Nectari database for the table. Do not put spaces. |
| Data Type | Select the database type for the cube to be built with. |
| In Production | When the option selected, the cube structure cannot be modified. When unchecked, the structure can be changed but the cube data is not accessible to users. |
| Description |
The description cubes are used to synchronize the description table in the data warehouse, as descriptions are usually not included in a regular cube. For example, you could have a description cube for the customer table that holds the customer ID and name only. Once created, you can use this cube as a generic table to get the customer name in the Data Model definition of your “real” cube. |
| Logging | Select the option to write in the log every time the cube is built, loaded or refreshed. The log is stored in the database, therefore it is not recommended to log after the cube has been refreshed several times, to not overload it. |
| Columnstore indexes |
Option to create columnstore indexes with the cube. Columnstore indexes use less disk space and OLAP cube slices are loaded faster; for further details, click here.
|
| No null in sources | Option to remove NULL logic from the WHERE clause when the source does not contain NULL data. This applies to Oracle data warehouses only. |
| Disable indexes during Refresh |
When performing a Refresh, select this option to disable the index before inserting data in the history table. The index will be enabled again after the insertion. This option could improve performance when refreshing a large amount of data. Note: Note that this option cannot be enabled when Columnstore indexes is set. |
Navigation
In the Navigation drop-down list:
-
Dimensions: refer to Dimensions
-
Measures: refer to Measures for more details.
-
Data Sources: refer to Data Sources for more details.
-
Slices: refer to Slices for more details.
-
Scheduler: refer to Scheduler for more details.
-
Logs: refer to Viewing Logs for more details.
Actions
In the Actions drop-down list:
-
Build Cube: SeeBuild for more details.
-
Copy Cube: See Copying a Cube for more details.
-
Delete Cube: See Deleting a Cube for more details.
Refresh Screen Data
- In the Navigation Bar, click on
to refresh the information in the main panel.
