Create and Configure a Workbook
A workbook is created empty, then configured with permissions and opening options before it holds any data. Workbooks do not autosave, so changes should be saved frequently to avoid losing work.
tip
Workbooks can be organized into folders, such as Finance, Sales, or Budget, and folders can be nested inside other folders for further organization.
Set up the initial workbook
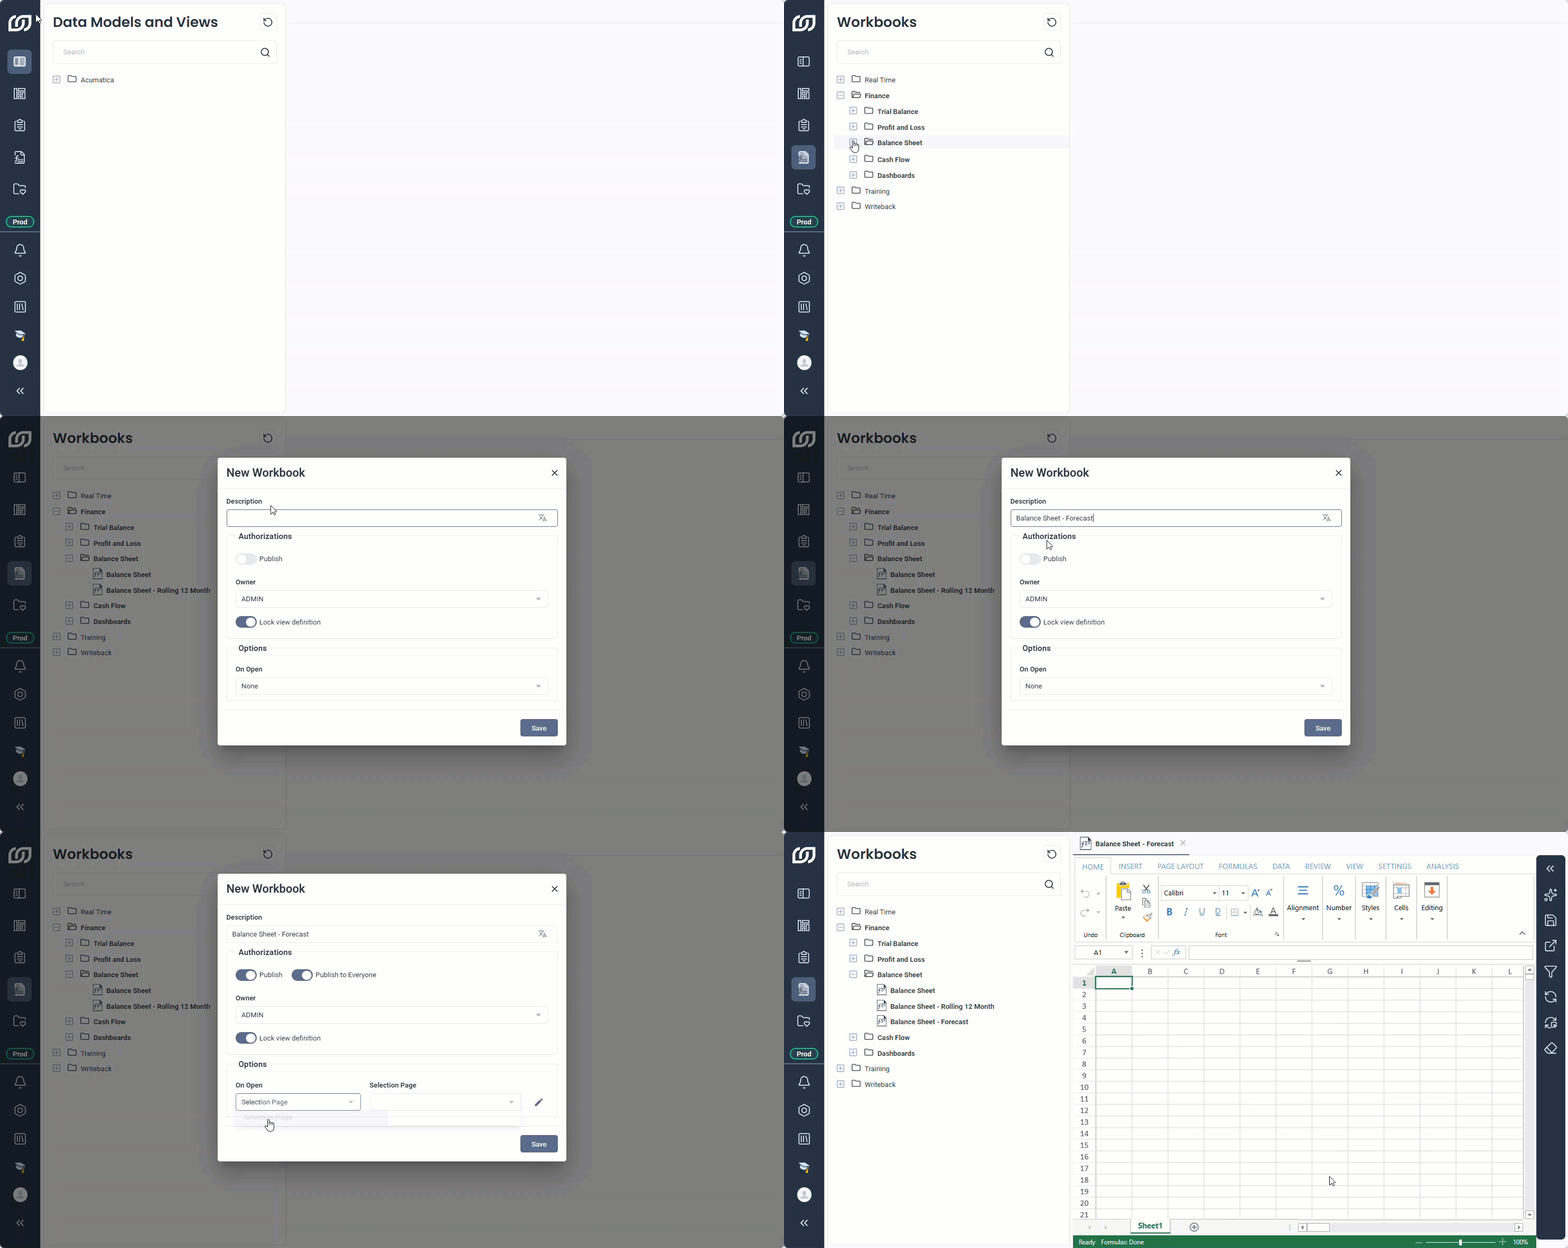
- In the navigation panel, select Workbooks.
- (Optional) Expand the folder to add the workbook to.
- Right-click an empty space and select New Workbook.
- In Description, enter a name.
- Select the authorizations and options.
- Click Save.
Multilingual titles
Next to Description, the translate icon adds a title in a different language, useful for organizations working across multiple languages. Changing the culture language automatically switches every title to its corresponding translation, provided the language dictionaries are already mapped.
Authorizations
| Setting | What it does |
|---|---|
| Publish | Activate to make the workbook available to others. Otherwise, it stays private to the Owner. |
| Publish to Everyone | Automatically selected when Publish is enabled, sharing the workbook with every user in the same environment. |
| Select groups to publish to | Appears when Publish to Everyone is turned off, specifying which groups the workbook is shared with. |
| Owner | Assigns the workbook to a specific user, who keeps full access regardless of the publish settings. |
| Lock view definition | Restricts edits to the owner, preventing changes from other users. |
Opening options
| Option | What it does |
|---|---|
| On open | Sets whether a selection page shows before the workbook opens, limiting the loaded data to a primary selection. Select None to skip it. |
| Selection Page | Appears when Selection Page is selected under On Open, choosing which page to use. With the right permissions, the pencil icon adds or edits a global selection page. |