Setup the Field Section
As we say in Add Tables, adding a table includes by default the importation of all its related fields. Fortunately, you can tick and untick the field checkboxes depending on which you are interested in. By being more specific through the removal of some fields, you:
- Speed up the synchronization of your data,
- Take less storage space in the destination.
To get access to the fields:
- From the Tables window, click on the hyperlink number in the Fields column.

- In the Sync column, untick the unnecessary field checkboxes and click on Save.

By default, the Primary key of the table will already be selected if the source connection was able to provide the information. If not or if you want to change it, you can directly select it in the Primary Key column.
The Tracking key![]() Helps identifying the field used in the incremental load. helps identifying the field used in the incremental load. The tracking key you should be using is defined by the tracking type you chose during the creation of your source creation. Refer to Add a Source and Destination Connection to get more details.
Helps identifying the field used in the incremental load. helps identifying the field used in the incremental load. The tracking key you should be using is defined by the tracking type you chose during the creation of your source creation. Refer to Add a Source and Destination Connection to get more details.
You can filter the data in a specific field by enabling the Distinct Records feature when previewing data. To access to this feature, select a Field in the list and click on the magnifier icon located in the upper-right hand corner.
- From this window, you can change the Field destination name by clicking on the row of the Field Destination column then on Save to keep the changes.
As for the Table destination name, the name you give to the Field destination can never be a field that already exists in the destination or that was not previously created by Data Sync module.
- If required, you can also use the drop-down list in one of the row of the Type destination column to change its value and click on Save to keep the changes.
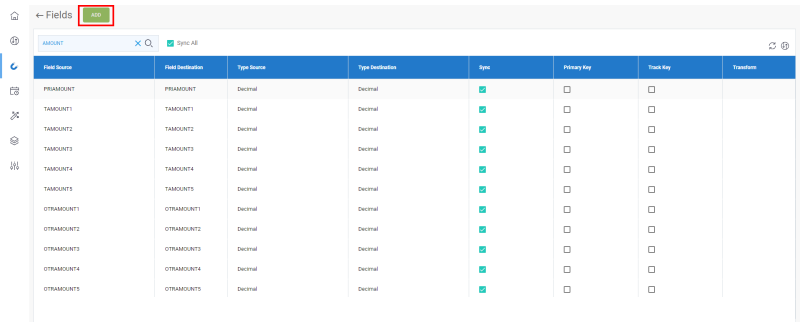
- For specific needs, it is possible for you to add calculated field:
- Click on Add.

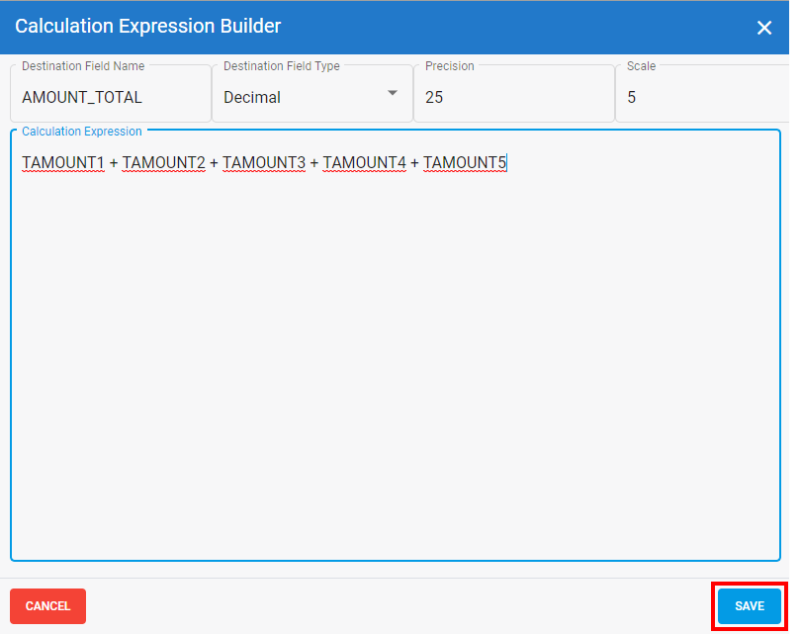
- In the Destination Field Name field, enter a name for the field destination.
- In the Destination Field Type drop-down list, select the type the calculation result should be.
NoteIn this example, we are looking for the Total Amount so we choose the Decimal (numbers) value for which we want it to 25 characters long (Precision) with 5 decimal digits (Scale).
- Click on Add.
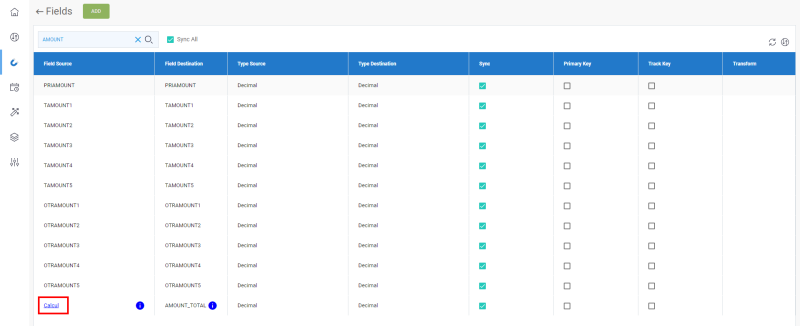
Once in the list, you can:
- Do a mouse over on the tooltip to see the whole calculation,
- Click on the CALCUL hyperlink in the Field Source column to change the calculation any time.
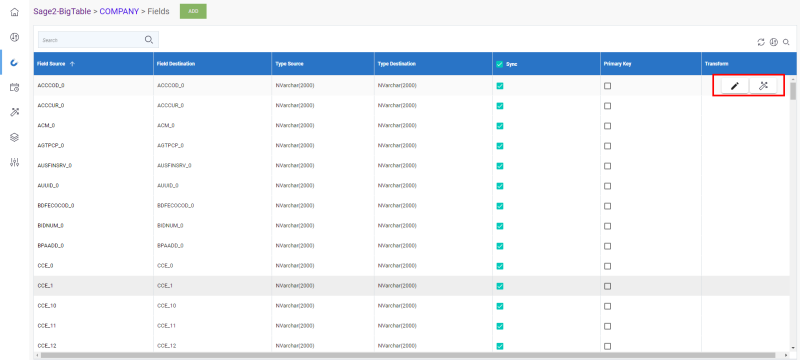
- For each field, you can either use the drop-down list in the Transformation column by clicking on the pencil icon to select the existing transformation you want to apply or create a new one by clicking on the magic wand icon.

When you create a Transformation from the Fields, you can import the values directly from the Source connection by clicking on .
The Transformation feature is often used during the data migration from a system to another one especially when the data nomenclature between systems is not the same. Refer to Transformation Page for more details.

