Installing the Nectari Server (Advanced)
This topic describes the steps to install the Nectari Server using the advanced installation type. This installation type allows you to select the components you wish to install on the server depending on your installation scenario. It also enables you to install Nectari in multi-tenant mode.
Depending on the components you select to install, the number of screens will vary. The OLAP Worker and Distribution Worker do not have their own screens.
-
Run the Nectari Server.exe on the server and click Next.
NoteYou might get a screen prompting you to install certain prerequisites if they are not already installed on the server. Click Install and they will be installed automatically.
-
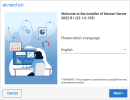
In the Welcome screen, select the desired language for the installation and click Next.
-
In the License Agreement screen, read the end user license agreement and click I Agree.
-
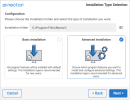
In the Installation Type Selection screen:
-
Enter or browse for the installation path.
-
Select Advanced Installation.
-
Click Next.
-
-
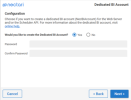
If the Dedicated BI Account is not created yet, the Dedicated BI Account screen is displayed:
-
If you want to create the Dedicated BI Account:
-
Select Yes.
-
Enter the password of the new dedicated BI Account in Password and Confirm Password.
-
Otherwise, select No.
NoteIf the NECBIAccount is created for the first time, restarting the server is necessary for Excel Add-in distribution to work.
-
-
Click Next.
NoteFor more information about the Dedicated BI Account, see the section Dedicated BI Account.
-
-
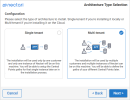
In the Architecture Type Selection screen:
-
Select Single-tenant if only one instance of Nectari will be installed in the ecosystem.
-
Select Multi-tenant if multiple instances of Nectari will be installed in the ecosystem. The multi-tenant architecture is recommended for load balancing scenarios in the case of a high volume of data or a high amount of processing.
-
-
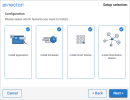
In the Setup Selection screen:
-
If you wish to install all Nectari components, leave them selected. Otherwise, click the component box(es) to remove it(them) from the installation.
-
Click Next.
-
-
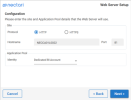
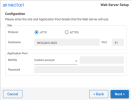
If you selected the Application component and/or the OLAP Worker and/or Distribution Worker, the Web Server Setup screen is displayed:
-
Select the protocol.
-
If you select HTTPS, make sure that a certificate is already installed on the machine for this kind of IIS website. Select the certificate from the drop-down list.
-
Otherwise, select HTTP.
-
-
Enter the host name.
-
Enter the port. The default port is 81.
-
Select the type of account for the IIS application pool:
-
If you select Dedicated BI Account, enter the password if it was previously created on the machine. Nothing must be provided if it is being created.
-
If you select Custom Account, enter the username and the password of an existing user on the machine.
-
-
Click Next.
-
-
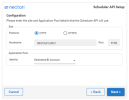
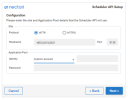
If you selected the Scheduler API component, the Scheduler API Setup screen is displayed. Repeat the steps mentioned previously for the Web Server Setup screen.
-
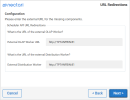
If you removed components from the installation, the URL Redirections screen is displayed.
-
Enter the external URL of the missing components to connect to them.
-
Click Next.
-
-
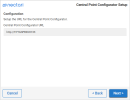
If you selected the Multi-tenant installation, the Central Point Configurator Setup screen is displayed:
-
Enter the Central Point Configurator URL. The URL must include the port number at the end; for example: http://YOURCENTRALPOINT:8133.
-
Click Next.
OR
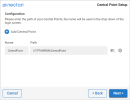
If you selected the Single-tenant installation, the Central Point Setup screen is displayed:
-
Enter the name for the Central Point.
-
Enter or browse for the Central Point path. Make sure that the given path is a real path to a central point (if it is the case, it should contain a nec-centralpoint.xml file).
NoteAn unlimited number of Central Points can be added to the list of central points. Click + to add more Central Points.
-
Click Next.
-
-
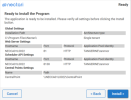
In the Ready screen, make sure that all the parameters are correct for the installation and click Install.
-
In the Installation screen, wait for Nectari to be installed and ready for use. This may take a few minutes.
-
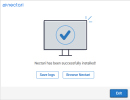
When the installation is completed, the Setup screen is displayed with a confirmation message.
-
Click Exit to close the installation wizard.
-
Click Browse Nectari to open the application.
-
Click Save logs to save and view the logs if the installation was unsuccessful.
-
